Install Kali Linux Using Virtual Machine
Author : Angeline Indahsi
To start installing Kali Linux with virtual machine, open a virtual machine application first. In this tutorial, we are going to use VirtualBox as the virtual machine. To create a new virtual machine, click new on the top left corner, and it will be shown like the picture below:
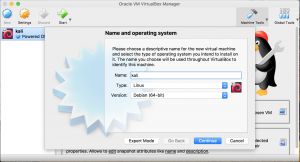
Enter any name for the kali linux virtual machine, then select Linux as the type, and the version should be either Debian (32-bit) or Debian (64-bit), based on the kali linux iso file that you install on the kali linux official website.
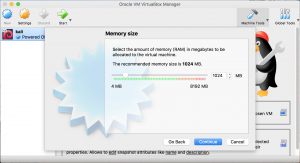
After clicking the continue button, you will be shown to a new page where you have to configure the memory size for your Kali Linux virtual machine, just like the picture above. The recommended memory size is 1024 MB, but you can still add more memory size before clicking continue.
Create a Virtual Hard Drive
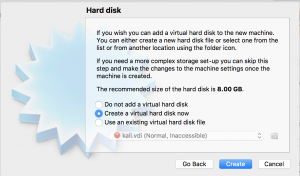
After adjusting the memory size, you are required to create a virtual hard disk for your virtual machine. Select “Create a virtual hard disk now” and click continue, as shown in the picture above.
Selecting Hard Disk File Type
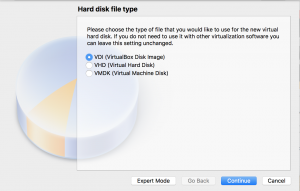
On the hard disk file type window, select VDI (VirtualBox Disk Image), and click continue.
Selecting Physical Hard Drive Allocation Type
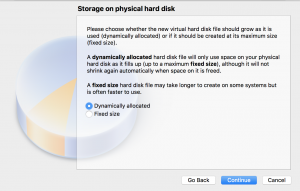
On this window shown by the picture above, choose Dynamically allocated, and click continue.
Allocate the Disk Size
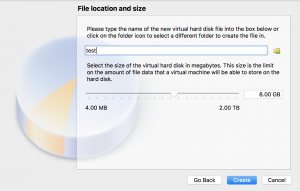
In the page shown by the picture above, you can choose the file on where to store the virtual hard disk drive (.vdi) in and choose the size of the virtual hard disk. You don’t need to change the file location. But you need to change the size of the virtual disk to 15.00 GB or more. After that, click create and you are done creating the virtual machine. When you’re done, the name of your virtual machine will be shown on the main page of VirtualBox, on the left side, as shown on the picture below.
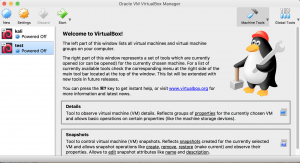
Add the Kali Linux .iso file into the Virtual Machine
After creating a new virtual machine, you still need to put your installed .iso file into the virtual machine. To add the .iso file, go to settings (next to the new option on the top left of the main page), and it will show a new window like the picture below:
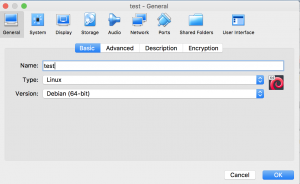
Then click the storage tab, and click on the disk icon below Controller:IDE, and it will be shown like the picture below:
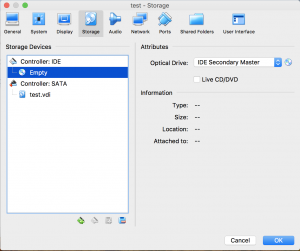
To insert the .iso file, click the disk icon near the IDE Secondary Master option (shown on the picture above).

When the disk icon is clicked, click on “Choose Virtual Optical Disk File…”, shown on the picture above, and find the location on where you save your .iso file in your computer. After finished, click the ok button.
Install Kali Linux
To start your virtual machine, click on your virtual machine name and click the start button, which is the green arrow button. A window of your Kali Linux will show the options, as shown with the picture below.
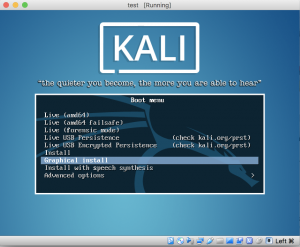
To continue to installation process, you may choose Install and Graphical Install. If you choose the normal Install option, the installation will be shown using text only. If you choose the Graphical Install option, the installation will be shown with user interface. In this tutorial, we will choose the Graphical Install option, so that it’s easier to follow. After that, press enter to go to the next step.
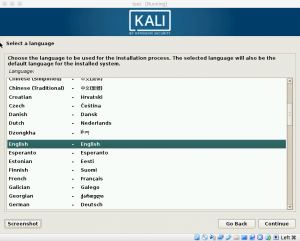
In the next step, you are required to choose the language, shown on the picture below. Once you finished choosing your preferred language, press the continue button.
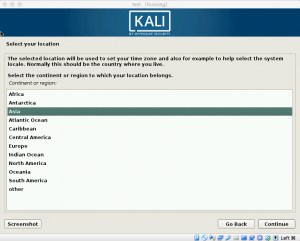
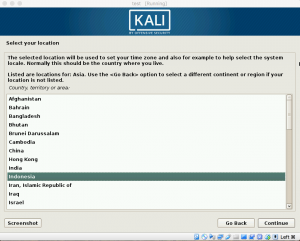
The next step requires you to choose your country, shown on the picture below.
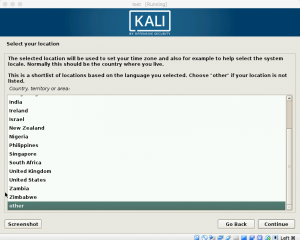
If your country is not in the options available, select other, then click continue. You are required to choose the continent of your country. Once you select your continent, click continue, and then you can select your country, then click continue to go to the next step.
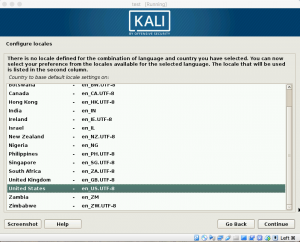
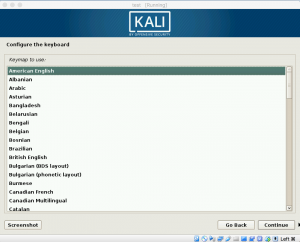
In the next step, you are required to select the keyboard layout. Then click continue to go to the next step.
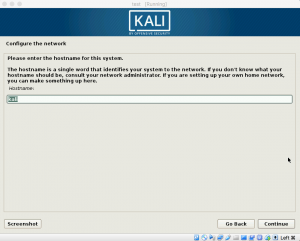
The next step, you are required to enter a host name, which will identify your system to the network. If you are not sure what to enter, just enter ‘kali‘ as the hostname.
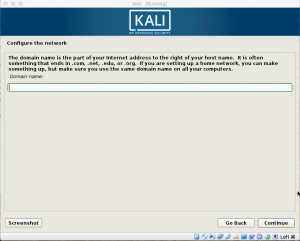
You are required to enter your domain name in the next step. Domain name is if you want to ping your computer in your LAN. But for this tutorial, since we don’t have a domain name, we are going to leave it blank and go to the next step.
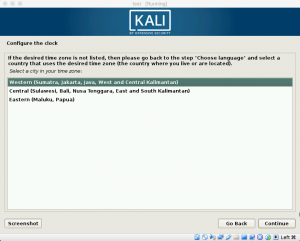
In the next step, you are required to configure the clock, based on the country that you have chosen earlier. After you have configure the clock, click ‘continue’.
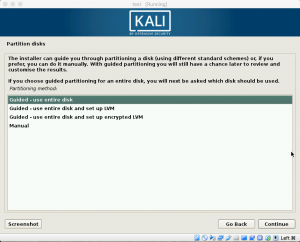
The next step is choosing a disk partitioning method. In this tutorial, we are going to choose the basic disk partitioning, the ‘Guided-use entire disk‘ option. Once you select that option, click continue.
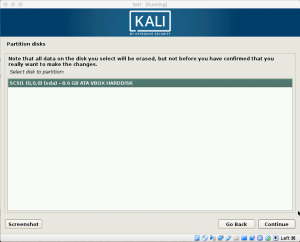
The next step requires you to select the disk to partition. There should only be one disk available. Select that option, then click continue.
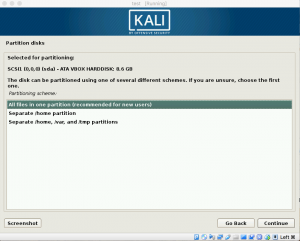
Then you are required to select the partitioning scheme. Select the “All files in one partition” option, then click continue.
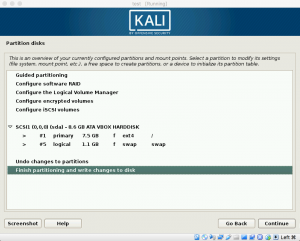
On the next step, where you can choose to finish the partitioning process or to undo the changes to the partitions, select “Finish partitioning and write changes to a disk” option to finish partitioning and go to the next step.
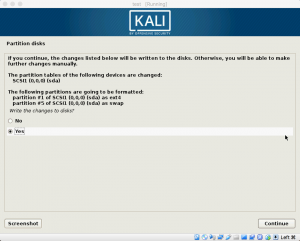
In the next screen, select the ‘Yes‘ option, to write changes to the disk and click continue.
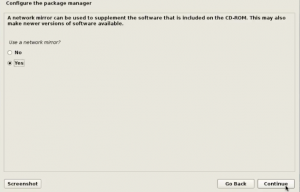
Next, you are asked if you want to use a network mirror or not. If you use network mirror, when there is a software update, it can tell you that a new update is available. Select ‘Yes‘ if you want to use a network mirror and click continue.
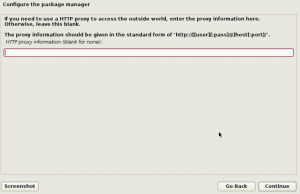
If you have a network proxy, you can fill in on the space provided. If you don’t have a network proxy, just leave it blank and continue to the next step.
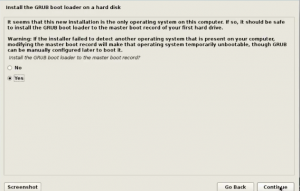
The next step, it will ask you if you want to install the GRUB loader on a hard disk. Select ‘Yes’ to continue, then you have to wait for the installation to finish.
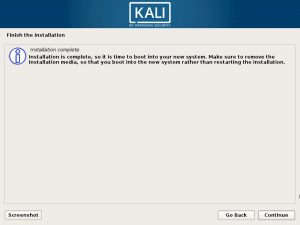
Once the installation finishes, a notice that said the installation process is complete will be shown. Then click continue to finish the installation.
Starting Kali Linux for the First Time
The screen will then restart and a menu (like the picture below), will show. Choose the first option, then press enter.
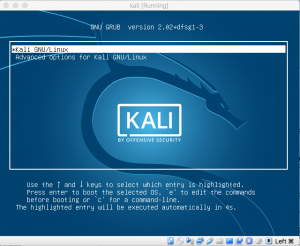
Then you will be redirected to enter your username and password. For the username, type “root”, and for the password, type your password that you have set during the installation process. And you will be directed to your Kali Linux desktop.
That is all for the Kali Linux tutorial, and good luck.